Introduction
An important service provided by the librarians is to conduct instructional classes to teach students important skills, often called information literacy skills, that will make them better users of the library and researchers. In preparation for teaching these classes, librarians put together lesson plans that are used to help organize and structure the content presented during the class. The lesson plans are an important part of the preparation process to conduct an effective class.
The Challenge
The challenge in preparing lesson plans for instruction is that the current method of doing this relies entirely on Microsoft Word documents that are saved as individual files per class instruction given. The Word documents provide a template, but require the librarian to find all the information needed about the class including information about the course in which they are providing instruction, details about the instruction such as date, session length, key instructional concepts, resources used, and specific instructional modules being taught with details for each. Little of this information is standardized and can vary depending on the way it is inputted. The data entry process is also time-consuming and it is cumbersome to work with the Word document.
The Solution
The solution is to move the process of creating lesson plans to an online location. By moving the process online it’s possible to take advantage of things like auto-populating form fields with data to keep entries consistent, guide the user through the form entry process, and provide the ability to organized the order of instruction through a drag and drop interface. The additional benefits of moving the process online is to keep data stored in a centralized location for statistical purposes. Finally, the online medium makes it possible to access and review saved lesson plans easier from any online device with a web browser.
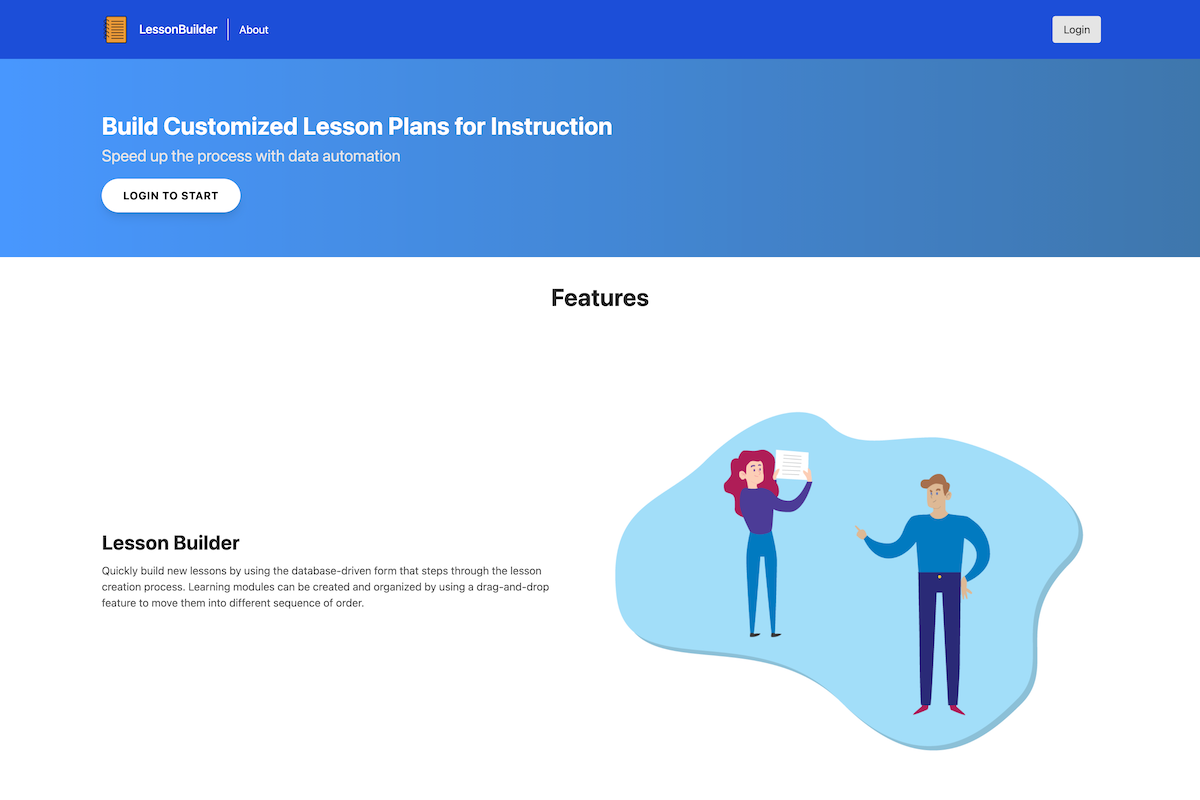
Lesson Builder - Project Website Homepage
UX Design
Although the website is not complex from a information architecture perspective, it is still important to work through the design before beginning to develop the website. The major design components of the website included the layout of elements like the header and navigation, list items, and form elements. These are the type of elements that are important to design well on any website. For this site, all these design elements need to be easy to read and their use clear to the user.

Wireframe - Lesson Builder Home Page
The home page shows the navigation, which is simple but clear. On the left side is the title of the site, which can also be joined with a logo graphic as the design progresses. The user is able to login/logout from the persistent button on the right side of the navigation bar.

Wireframe - Simple Navigation
Once a user has logged into the site, all the other navigational links are listed along side the site title - including new options that a logged in user is able to access.

Wireframe - Logged-In Navigation
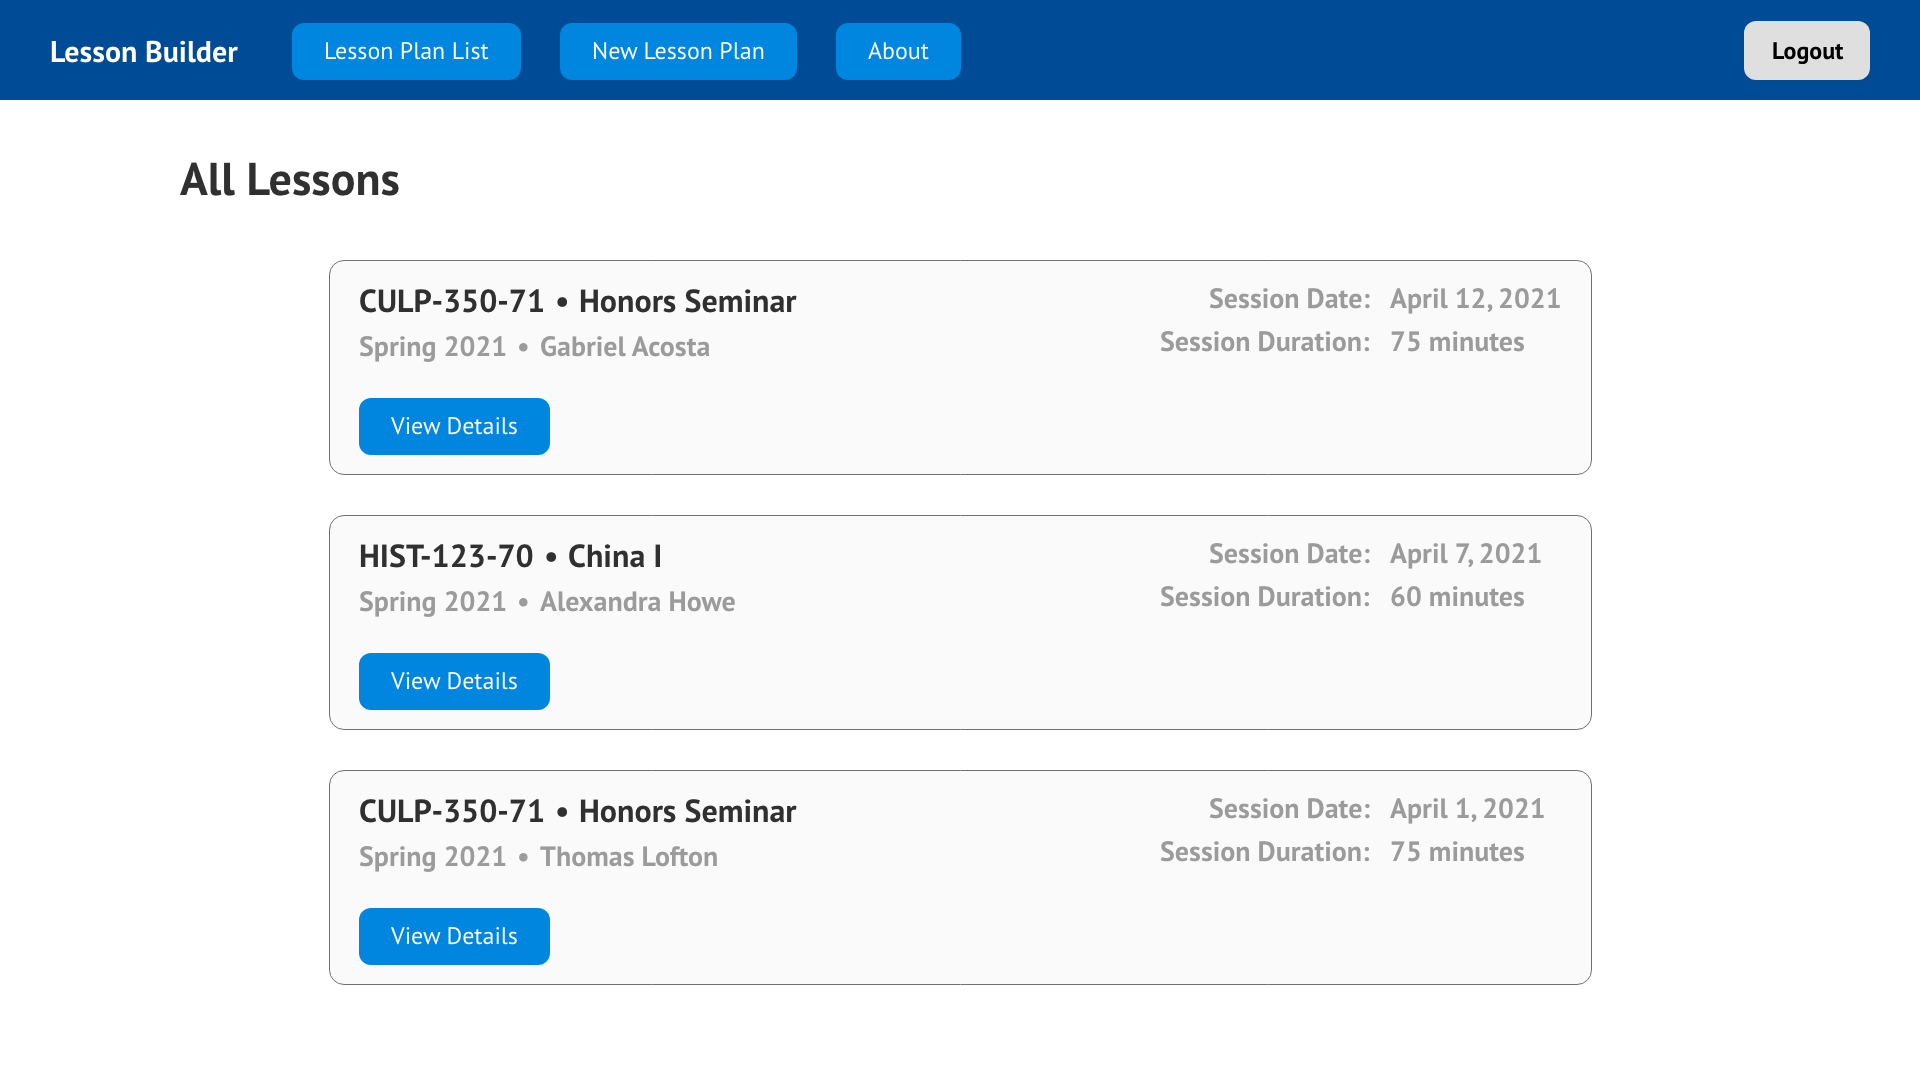
The more complex design elements of the site are the list for all the lesson plans and the form used to create a new lesson plan. The list of lesson plans is designed to encapsulate each individual lesson plan into a card-like element. The purpose of this is to clearly differentiate each lesson plan from each other. Each list element contains enough key information for the user to understand the contents of the list item and a link within the card to view more information about the item.
Wireframe - List of Lessons
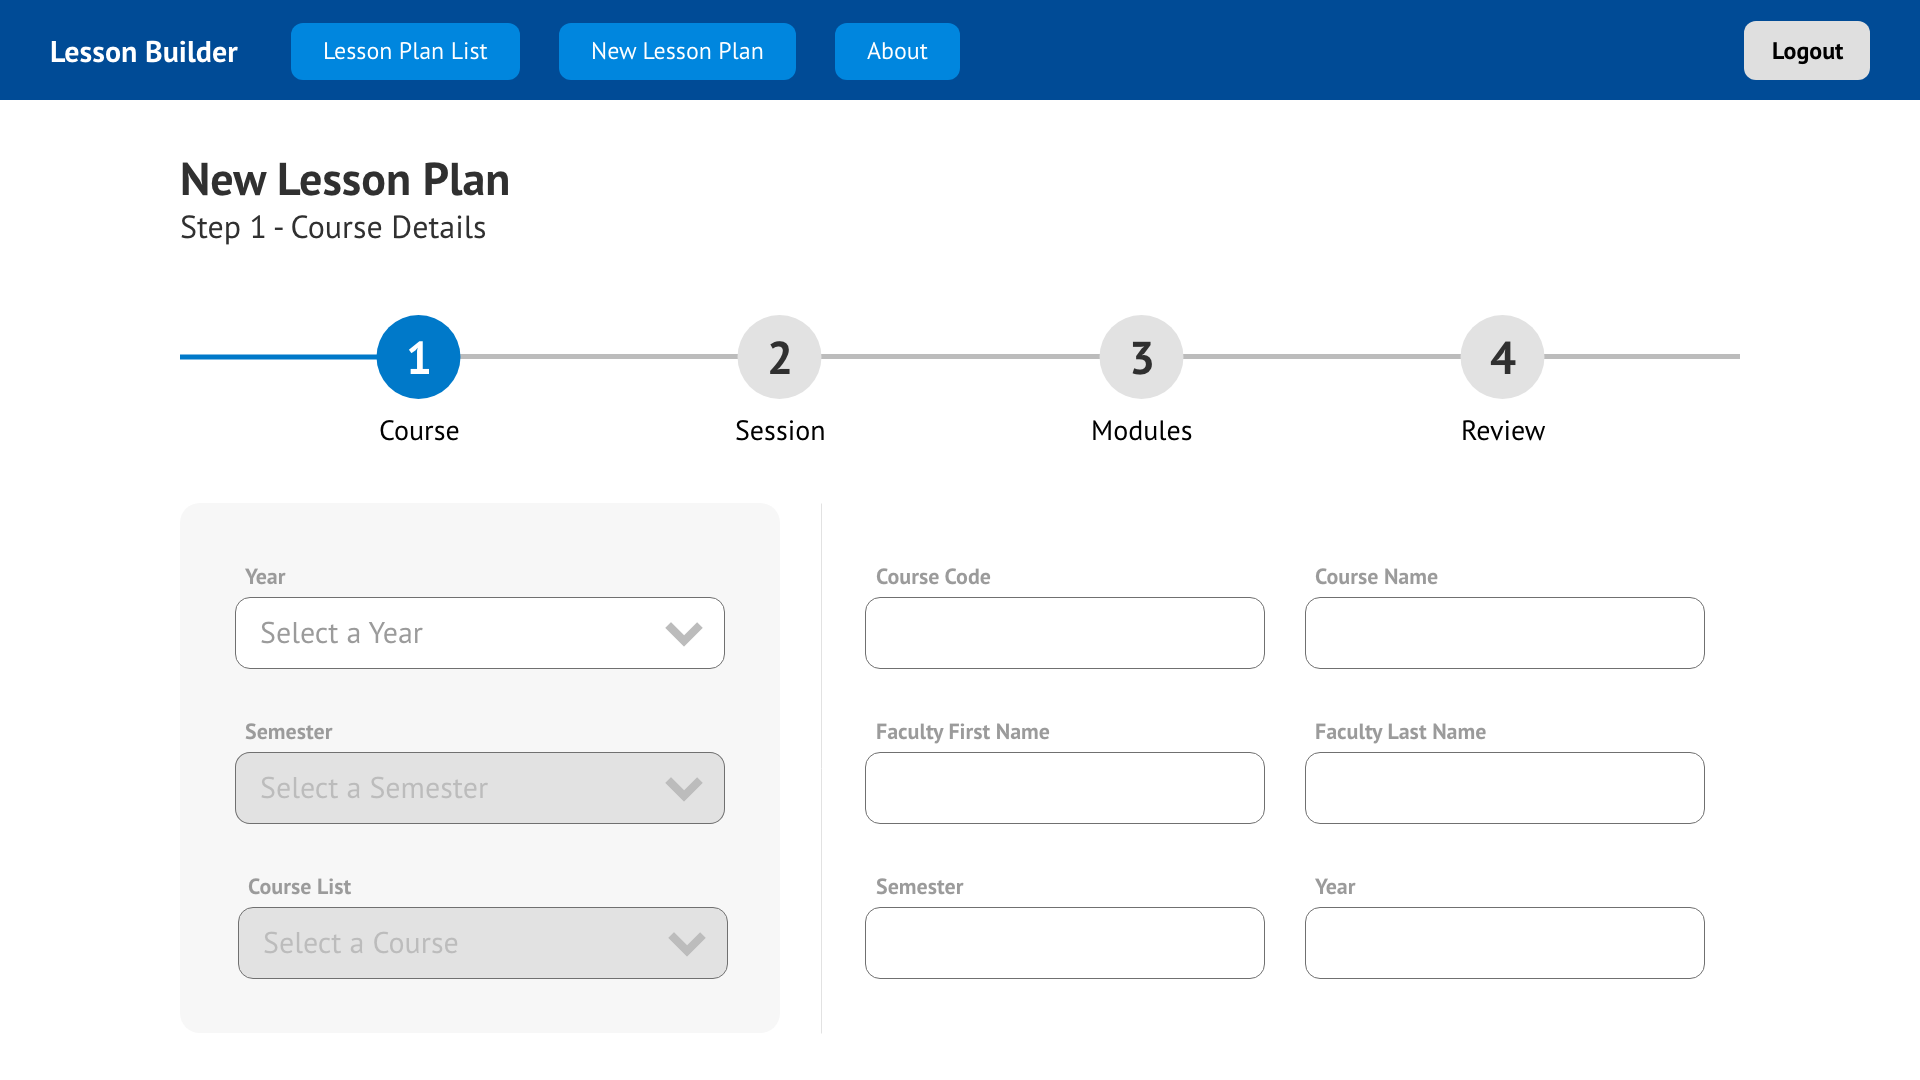
The most complex and important design element of the website is the form used to create a new lesson plan. Users would interact with the form over 4 separate steps before saving a new lesson. It’s important for form elements to clearly indicate what data was expected for each input. The design choice to split the form into several steps was made due to the amount of data that was needed to be collected by the form and the different types of form elements that would be used in the form including text and textarea inputs, select option inputs, checkboxes and radio buttons lists, and combinations of form elements for features like the individual instructional modules.
Wireframe - New Lesson Form
To implement the design the CSS Framework TailwindCSS was chosen. This framework is easy to use with a front-end library like React since it expected developers to make use of component design. TailwindCSS can be applied to individual design elements like form controls, cards, navigation, and footers, which are elements used in this website. TailwindCSS is also easy to get set up and apply to the website during the development process.
Information Architecture
The information architecture of the public-facing website is very straight-forward. The website has a home page and five “sub-pages” - login, about, lists, list item detail, and the new lesson pages.
The Back-End
The front-end of the website includes the handful of pages that a user can access on the public-facing site. However, the back-end of the website is more complex and required more thought to implement. Because the back-end made use of WordPress, it was necessary to work within the WordPress environment to structure and build the back-end.
The back-end is structured into different pieces of data that are used on the website. The data includes:
- List of all courses offered (and which could have a library instructional session)
- List of all librarians who could offer instruction
- List of instructional modules that could be offered during the instructional sessions
- List of lesson plans
Each list was created using a plugin called Custom Post Type UI that allowed the creation of new post types that extended the types of data that could be saved to WordPress. This plugin allows a developer to add new types of posts, but the new types of posts only have fields available to the built-in post types that come with the default WordPress installation. To add other types of fields, another plugin called Advanced Custom Fields. This plugin allows the creation of customized fields that can be added to the post types created with the custom post type UI plugin. Using these two plugins, it was possible to create the data structures within WordPress. For example, the Lessons custom post type includes fields like session date, number of learners, information literacy concepts, and more.
Development
The development of the website, although it was seemingly a simple site, has several prominent challenges. The challenges include:
- implementing authentication with React and JWT
- requesting data with the WordPress REST API
- storing data in state and sharing between components with the Context API
- implementing a drag and drop feature with React-DnD
- saving lessons to WordPress using the REST API and JWT
Authentication with React and JWT
Since the purpose of the website is to allow librarians view and create lesson plans, these sections of the website can not be accessible to users who are not authenticated. To implement authentication with JWT, the first step was to install the JWT Authentication for WP-API plugin. This plugin extends the WordPress REST API to expose a new endpoint /wp-json/jwt-auth/v1/token to the REST API. A POST request can be sent, which upon success will return a token that can be stored for subsequent POST requests. In this application, an asynchronous request is sent to the WordPress REST API with the fetch API.
try {
  const response = await fetch(loginUrl, {
    method: 'POST',
    body: JSON.stringify({
      username,
      password,
    }),
    headers: {
      'Content-Type': 'application/json',
    },
  });
  if (!response.ok) {
    const error = await response.json();
    // login error
  } else {
    const user = await response.json();
    const token = await user.token;
    // login success, do something with token
  }
} catch (error) {
  // handle error
}
Requesting data with the WordPress REST API
The WordPress REST API comes built-in to a WordPress installation. The documentation for the WordPress REST API is extensive and offers a lot of options for sorting and ordering data returned from the WordPress site. The following request queries the courses post type, for a total of 100 records per page, and specifies the fields id, title, and acf, which is the fields from the advanced custom fields added to courses. Finally, the request orders the results by title and in ascending order.
/wp/v2/courses?per_page=100&_fields=id,title,acf&orderby=title&order=asc
Storing data in state and sharing between components with the Context API
The next part of the process is storing the data once it has been returned from the WordPress REST API. To do this, the Context API is used and enables the sharing of state data between components. Making use of the Context API requires some set up work, but once it’s in place, there are many benefits. One way to make use of it is to create functions that can make requests to the WordPress REST API and store that data into a state object.
The first step is to create a function that can retrieve data, from the librarians post type here.
const getLibrarians = useCallback(async () => {
  let restURL = `${restRoot}/wp/v2/librarians?_fields=id,name`;

  try {
    const response = await fetch(restURL);
    const data = await response.json();

    if (data) {
      dispatch({ type: GET_LIBRARIANS, payload: data });
    }
  } catch (error) {
    dispatch({ type: OPTIONS_ERROR, payload: error.message });
  }
}, [dispatch]);
Next, a reducer function can be used to handle adding the retrieved data to state.
case GET_LIBRARIANS: {
  return {
    ...state,
    librarians: action.payload,
    optionsError: null,
  };
}
At this point, the data stored in state, as well as the function used to request the data, can be made available through the Context API Provider component.
The website makes use of data from the librarians post type in a few places within the website and can be accessed through the Context API. This reduces the need to pass data and functions between components as props, which helps reduce the amount of code within components and helps keep track of data within a component since there’s no need to pass and receive data as props.
Implementing a drag and drop feature with React-DnD
A key feature of the website is the option to reorder modules for the lesson instruction. This feature also needs to work in conjunction with react to update state, which is then sent as part of a POST request to the WordPress REST API when saving a new lesson. This was done by adding the React DnD npm package to the project. This package implements a drag and drop feature that also updates state.
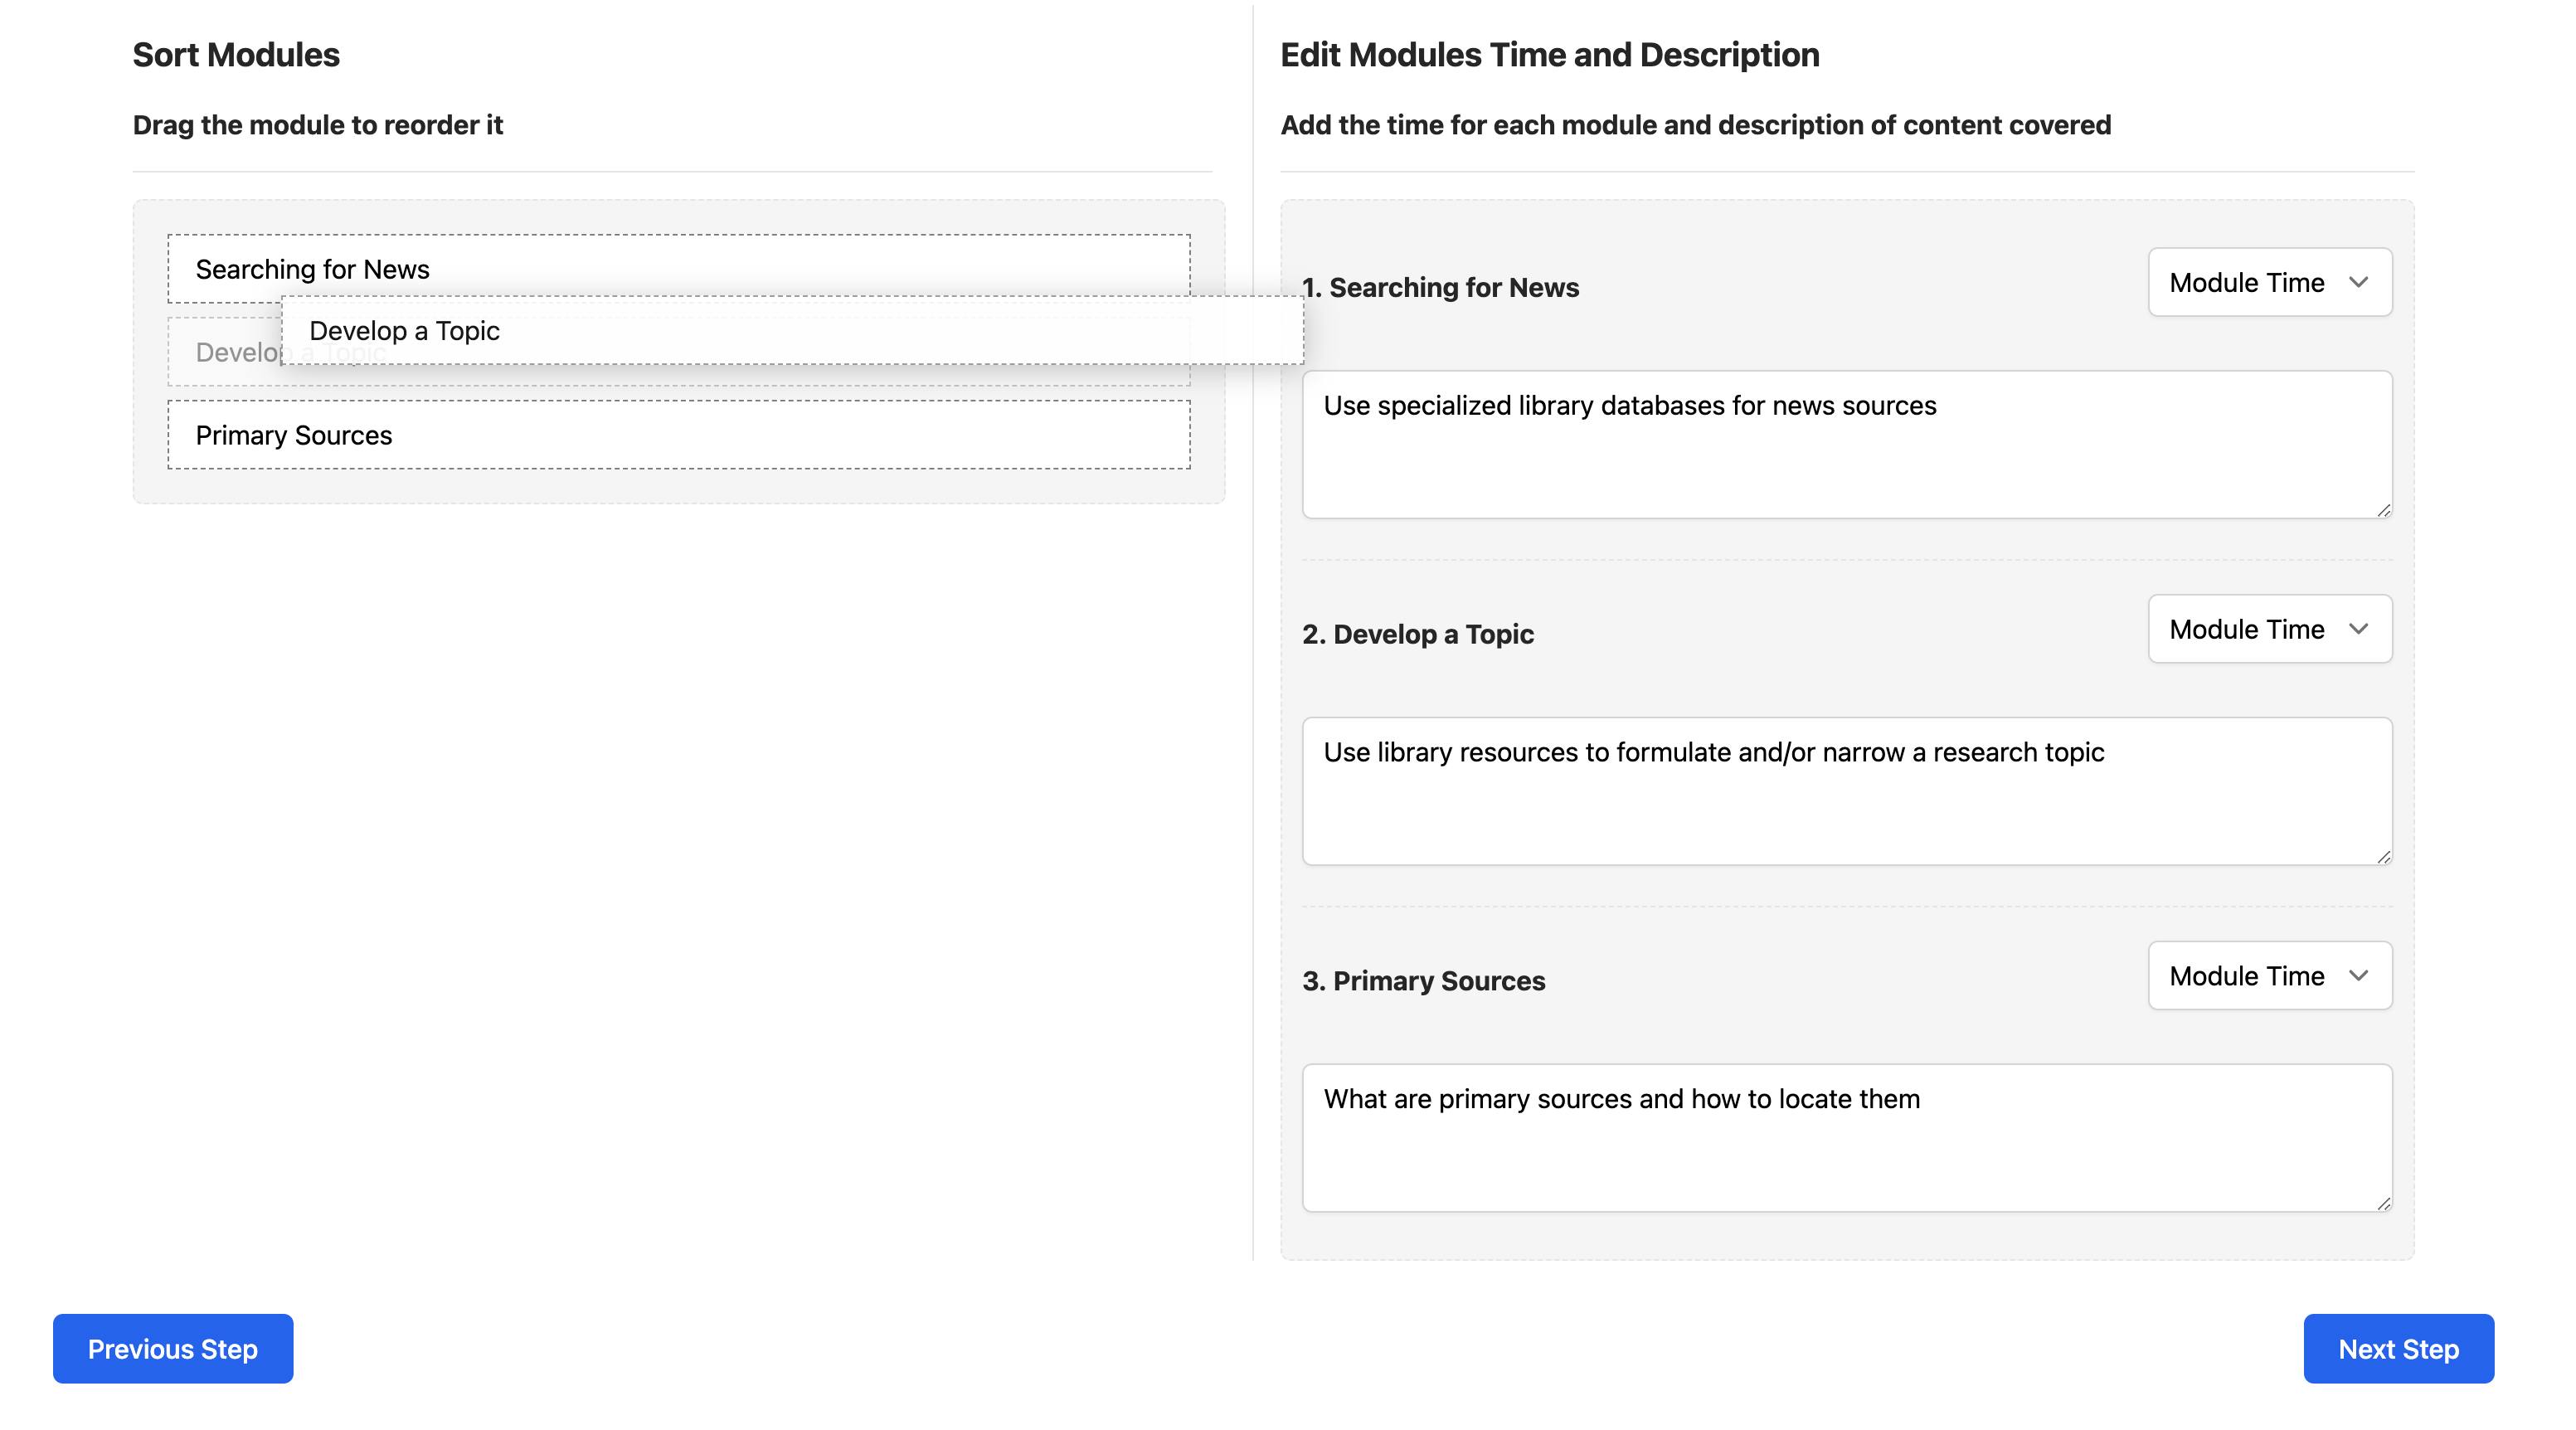
Drag and Drop Feature in Action
A key implementation step was taking advantage of the moveCard function to update a local state for the list of modules. This enabled keeping track of the order of the modules, which is important for the delivery of the lesson.
const moveCard = useCallback(
  (dragIndex, hoverIndex) => {
    const dragCard = modulesList[dragIndex];
    setModulesList(
      update(modulesList, {
        $splice: [
          [dragIndex, 1],
          [hoverIndex, 0, dragCard],
        ],
      })
    );
  },
  [modulesList]
);
Saving lessons to WordPress using the REST API and JWT
Once the data for a new lesson had been built and saved in state with the Context API, the next step is to send a POST request to the WordPress REST API to create a new entry for the lessons post type. The additional piece for this request, however, is the inclusion of the token to authenticate the request as a valid request. This is done by adding a Bearer token to the request, which has been saved from the initial login authentication. Upon success, the resulting id from the request response is used to redirect the user to the details page for the newly created lesson.
const postLesson = useCallback(
  async (lessonData, token) => {
    let postLessonUrl = `${restRoot}/wp/v2/lessons`;

    try {
      const response = await fetch(postLessonUrl, {
        method: 'POST',
        body: JSON.stringify(lessonData),
        headers: {
          'Content-Type': 'application/json',
          Authorization: 'Bearer ' + token,
        },
      });

      if (!response.ok) {
        const error = await response.json();
        dispatch({ type: LESSON_POST_ERROR, payload: error.message });
        // login error
      } else {
        const result = await response.json();
        dispatch({ type: SAVED_LESSON, payload: result.id });
        // login success
      }
    } catch (error) {
      dispatch({ type: LESSON_POST_ERROR, payload: error.message });
    }
  },
  [dispatch]
);
These examples are only a few of the development challenges from this project. Working with the WordPress REST API is powerful and the tools available from the React library offer some creative development possibilities.
Conclusion
The Lesson Builder website is simple, but showcases several interesting technologies used in conjunction with each other. A common approach to developing data-driven websites is to create a separate front-end for presentation and a back-end for data storage. Using WordPress as the data store and React as the presentation layer, connected through the WordPress REST API, is an effective combination of technologies. JWT is also a powerful tool for authentication, but also approachable for developers since the concept behind it is straight-forward. Finally, since modern websites often include interesting interactive elements, it’s nice to be able to add functionality like drag and drop that works well within the React and WordPress REST API ecosystem.